Nurse in style with this EASY DIY Breastfeeding Hoodie – it’s super simple to make (less than an hour) and a very functional nursing outfit!

Nursing really limits the kind of clothing you can wear.
I mean, I’m grateful that I can breastfeed, and I’d certainly take an inconvenient wardrobe over not being able to. Still, it can be a little bit difficult at times.
It also doesn’t help that clothes designed specifically for nursing are kind of expensive! I recently saw a couple different nursing hoodies floating around, and I loved the idea of them.
Just not $40 loved. As I thought about it, it really seemed like such a simple idea. So I figured I could try my hand at one.
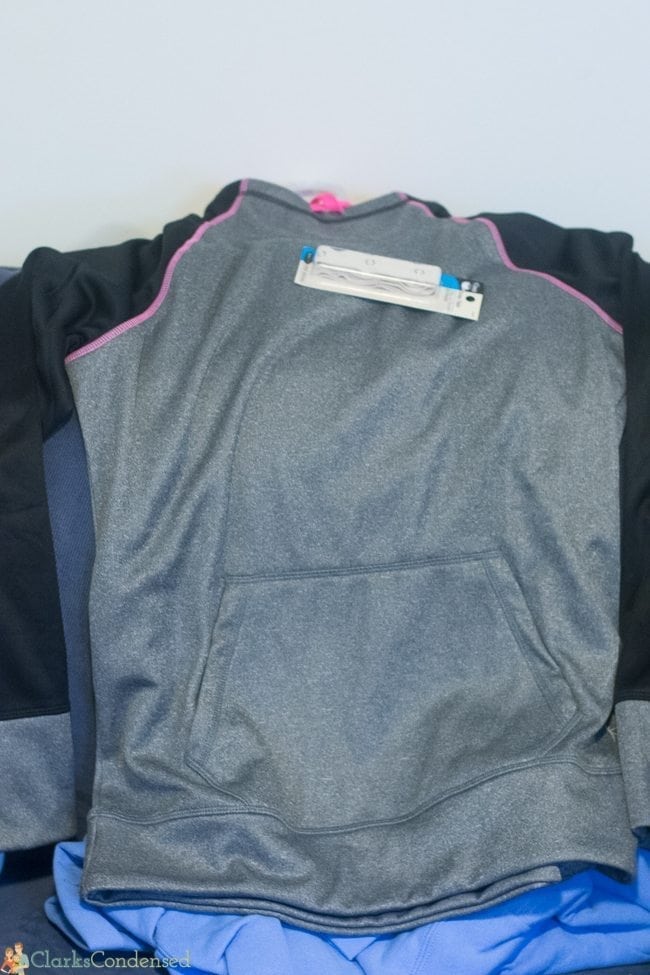
And it really is so easy and functional. I love how it turned out. I tried a couple methods, and this tutorial is definitely the best one. I got this hoodie at Walmart for $13 (though Gildan hoodies would work great), and the snap tape is $5 (though you can get it for 1/2 off with a good coupon at JoAnn’s).
I’ll admit, I felt super weird taking these pictures, but hopefully you get the idea. I love mine, and I think it’s a very simple project. It takes less than an hour from start to finish!
Materials:
Hooded Sweatshirt
1 package of snap tape
Coordinating thread
Rotary cutter or sharp sewing scissors
Cutting board (or something similar) that will fit inside the hoodie
Ruler (I used my acrylic ruler to measure and cut)
Zipper foot (essential for sewing on the snap tape – I have instructions listed for an alternative solution if you don’t have a zipper foot)
Directions:
Step One:
Put hoodie on and measure about 1 inch below your bust line. Make a mark.
Step Two:
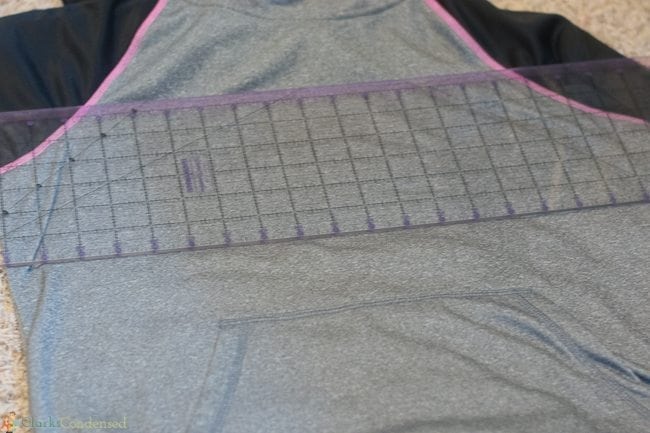
Place ruler on the hoodie so you have a straight edge in line with the mark you made from step one. Draw from one edge of the front of the hoodie to the next.
Step Three:

Place an acrylic ruler or other cuting board inside the hoodie and cut across the line using an acrylic ruler. Alternatively, if you have sharp enough scissors, you can just cut across.
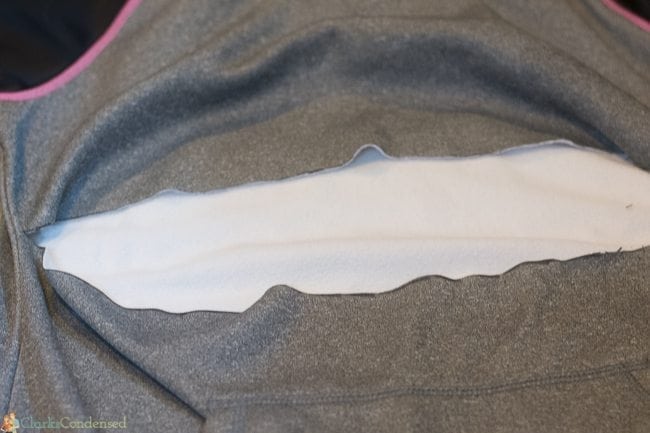
Step Four:
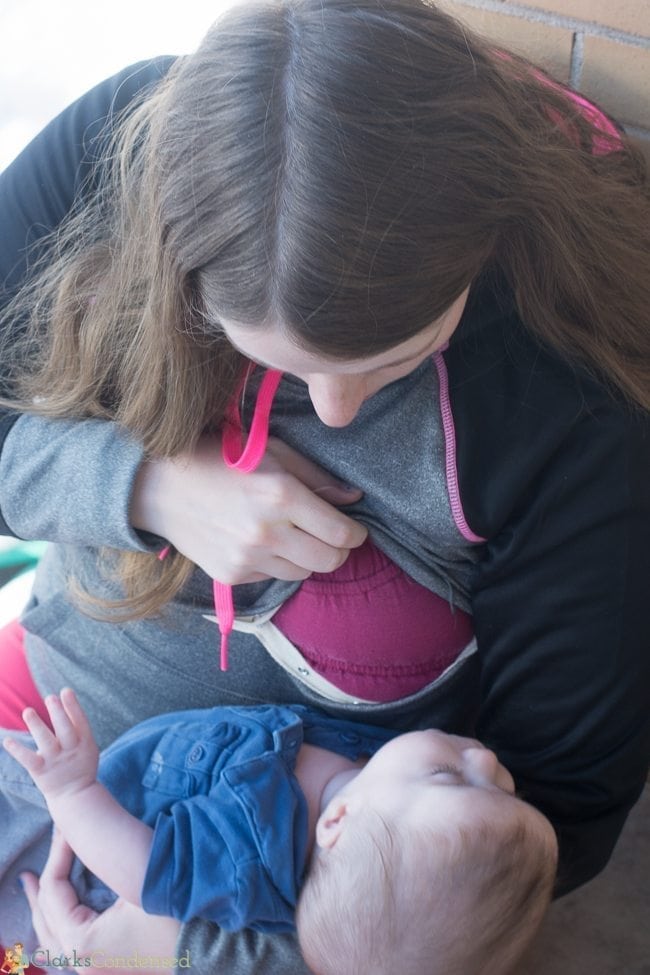
Pin one piece of the snap tape to the sweater, making sure the snap tape is about 1/8″ above the cut edge of the hoodie. You will use the piece of the snap tape that has the flatter snaps (not sure what that is called – look at the picture below for reference.)If there is excess room left on either side of the snap tape from the cut area, make sure to center the tape. You can sew these sides up more later (my snap tape went all the way across.)
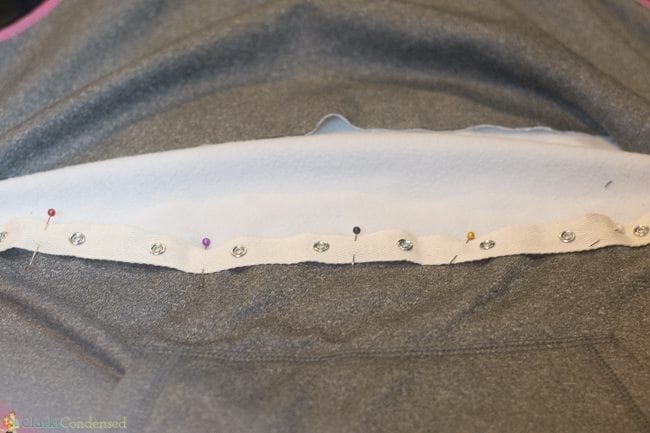
Step Five:
Zig zag stitch the snap tape to the sweater.
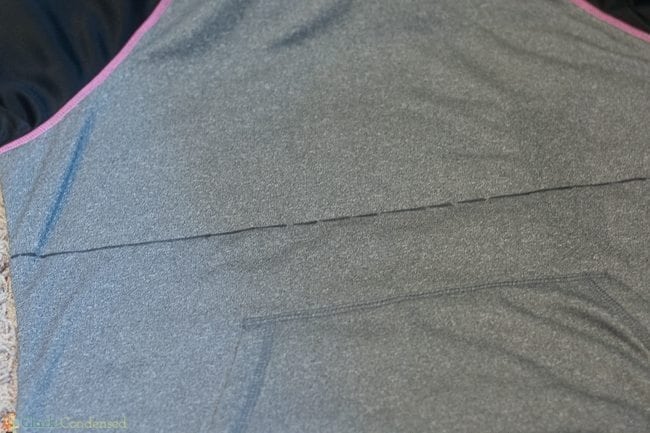
Step Six:
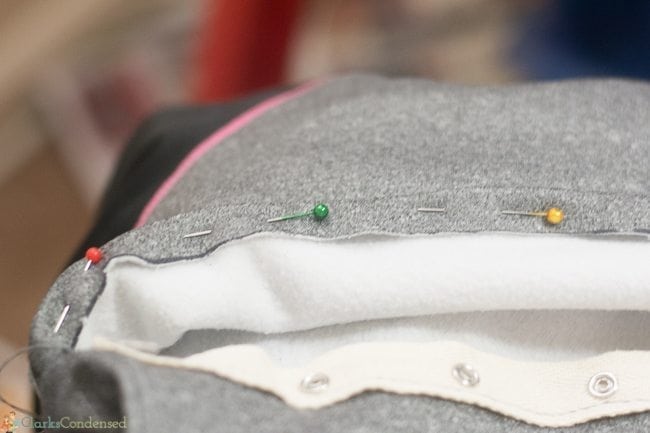
On the top part of the cut area, fold the material in to the inside of the sweater about 1/4 inch. Stitch across the folded edge and remove pins.
Step Seven:
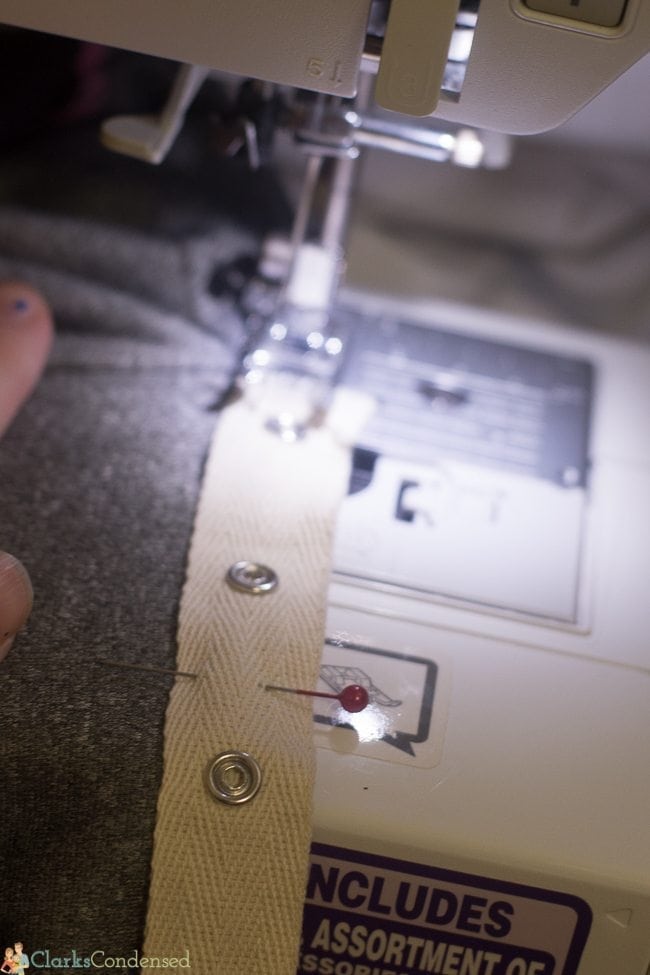
Place the other side of the snap tape onto the edge you just sewed. Make sure it lines up and snaps into place the the snaps on the lower cut edge. Attach with pins. Sew into place. With the snaps that are raised, you have to be more careful as you sew. I didn’t use a zipper foot at first, and the snaps kept getting caught. If you have a zipper foot, make sure you use it! Otherwise, sew very slowly, and just stop sewing before and after each snap. You can go back and hand stitch those areas closed later.
Step Eight:
Cut off the excess thread, snap together, and nurse on! If there is excess space on either end of the snap tape, sew together.